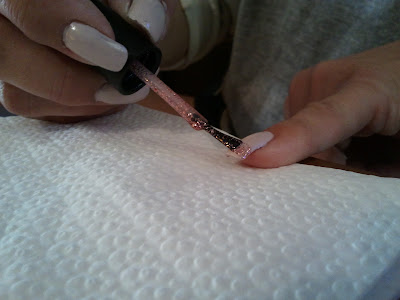
There are several ways to accomplish this effect, and I'm going to give you four. All four may be used with both acrylic and natural nails. The only difference is for the nude nail bed.
For Acrylic nails: Depending on the look of your acrylic (is it stained, too white, etc.) you may want to use a flesh toned nail polish as a base. Use a polish that is within one or two shades of your skin tone. The rest of the instructions are the same for both acrylic and natural nails.
For Natural nails: You may also want to use a nude colored polish as a base. It depends on the condition of your nail. Be sure to pick a polish within one or two shades of your skin tone. Regardless if you decide to use a nude polish or not, don't forget to use a base coat. The rest of the instructions are the same for both acrylic and natural nails.
For me personally, whether my nails are acrylic or natural, I prefer to use a nude base. I just like the look more, it seems crisper. But it is up to you :) For this demonstration,
I Used:
Orly- Decades of Dysfunction (nail bed)
Piggy Polish- Pink is the New Heart (tip)
1st Way: Freehand
This is my favorite way and is much easier than it seems. WAIT! Don't panic! It really is easy and you don't even have to be able to draw a straight line. Load the brush that came with the polish like normal. Then line the brush up with your tip and instead of moving the brush, roll your finger. You don't move the brush, just your finger. This will give you a crisp edge.
2nd Way: Scotch Tape
Once you have painted the base coat or base color and it has dried, use scotch tape to tape off the tip of your nail. Be sure to place the tape on your palm a couple of times to remove some of the stickiness. Place the tape at the tip of your nail. Be sure the tape is down firm so the polish won't leak under it. Paint the tip of your nail and immediately remove the tape. Otherwise the tape will pull up the polish. If doing more than one coat of the tip color, wait until the last coat to remove the tape.
 |
| The tape is hard to see, but it's there |
3rd Way: Hole Reinforcements
Another great way to do french nails is to use hole reinforcements. These can be bought cheaply at any store that carries office/school supplies. Just lay them on your nail following the line your tip. You can even save money by cutting them in half. Just like the scotch tape method, immediately remove the reinforcement as soon as you are done painting the tip.
4th Way: French Tip Guides
The last way is to use the french tip guides I've seen in every store that sells nail polish. Years and years ago, I bought some of these and I didn't like them. They were hard to use. They stuck to the nail and pulled up my nail polish, they always leaked polish under them and they were hard to get straight. But that could have changed since I last used them. If y'all use them, let me know how they work.
No matter which method you use, be sure to finish your nail with a good top coat. And remember, you can do this! Happy Polishing!!


No comments:
Post a Comment